
Full car detailing checklist: the professional workflow
By Sam W - SoapX Ltd.
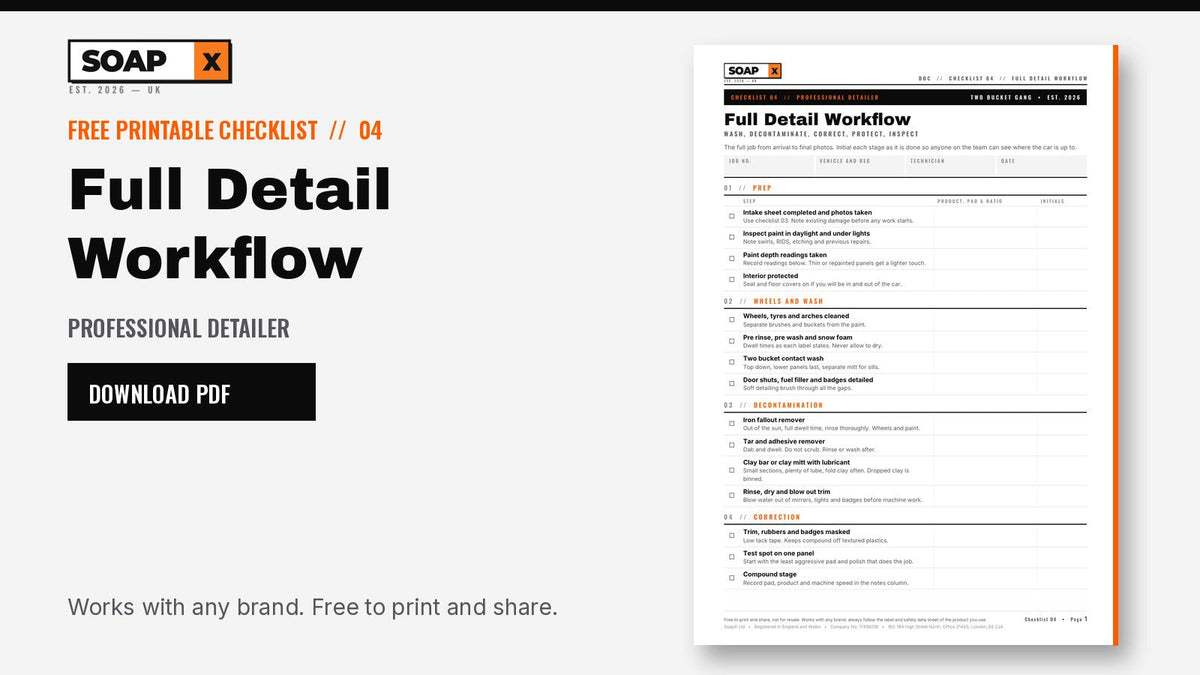
A full detail has thirty or more steps and it only takes one missed step to spoil it. This free car detailing checklist runs from intake to final photos, with an initials column so anyone on the team can see exactly where a car is up to, and a table for paint depth readings.
Free download // Checklist 04
Full Detail Workflow checklist. Two A4 pages with an initials column and a paint depth reading table.
What is on the full detailing checklist
| Section | What you tick off |
|---|---|
| Prep | Intake sheet completed and photos taken, inspect paint in daylight and under lights, paint depth readings taken, interior protected |
| Wheels and wash | Wheels, tyres and arches cleaned, pre rinse, pre wash and snow foam, two bucket contact wash, door shuts, fuel filler and badges detailed |
| Decontamination | Iron fallout remover, tar and adhesive remover, clay bar or clay mitt with lubricant, rinse, dry and blow out trim |
| Correction | Trim, rubbers and badges masked, test spot on one panel, compound stage, polish and refine stage, panel wipe to remove polishing oils |
| Protection | Protection applied to paint, wheels, glass and trim protected, cure time noted for the customer |
| Interior and finish | Interior valet completed, glass inside and out, tyres dressed, exhaust tips and engine bay (if booked) |
| Quality control | Inspect under multiple light sources, masking removed and gaps checked, final photos taken |
Every row has space to write the product and ratio you used. The sheet works with any brand, so it suits whatever is already on your shelf.
Built for a team
The initials column means the car can change hands between technicians without anything being done twice or missed. The product, pad and ratio column becomes a record of how each car was corrected, which is useful when the customer comes back next year.
Measure before you cut
The paint depth table covers thirteen panels. Thin or repainted panels show up as low or unusually high readings, and those panels get a lighter touch or are left out of heavy correction. Always start with a test spot using the least aggressive pad and polish that does the job.
Quality control is a step, not a feeling
- Inspect under more than one light source. Holograms and high spots hide under a single light.
- Check panel gaps, badges and trim for dried polish or wax.
- Take finished photos from the same angles as the intake photos.
How to get the most from it
- Print one per car and keep it with the job card.
- Initial each line as it is done.
- Record pad, product and machine speed for every correction stage.
- Give the customer the cure time in writing at handover.
Quick answers
What are the stages of a full car detail?
Prep and inspection, wheels and wash, decontamination, paint correction, protection, interior and finish, then quality control.
How do I know if paint is thin enough to avoid polishing?
Use a paint depth gauge and compare readings across panels. Unusually low readings mean less clear coat to work with, so use a gentler approach or leave that panel.
Why do a test spot before polishing?
It shows the least aggressive combination that gives the result you need, which keeps as much clear coat on the car as possible.
Kit for this job
- No.06 Fallout and Tar Remover
- No.07 Polish and Paint Prep
- No.08 Wax and Sealant
- Laser Edgeless Buffing Cloths
- Microfibre Applicator Pads 4 Pack
- Soft Detailing Brush Set of 3
Prefer one download? Get all 14 SoapX checklists in one PDF. They are free to print and share. Please do not resell them.
More from the Journal
Always read the label. Directions, dilutions and safety advice for every product are here:
